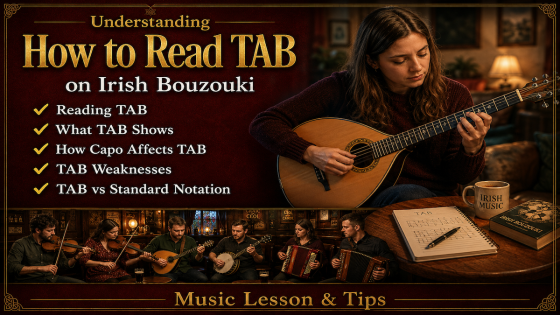
How to Accompany Slip Jigs on Irish Bouzouki & Tin Whistle in F# Minor
 Declan Plummer

Learn slip jig accompaniment, bouzouki chords, capo tips, counter melodies & F# minor whistle playing.
Learning Farewell To Whalley Range As A Slip Jig On Tin Whistle And Irish Bouzouki
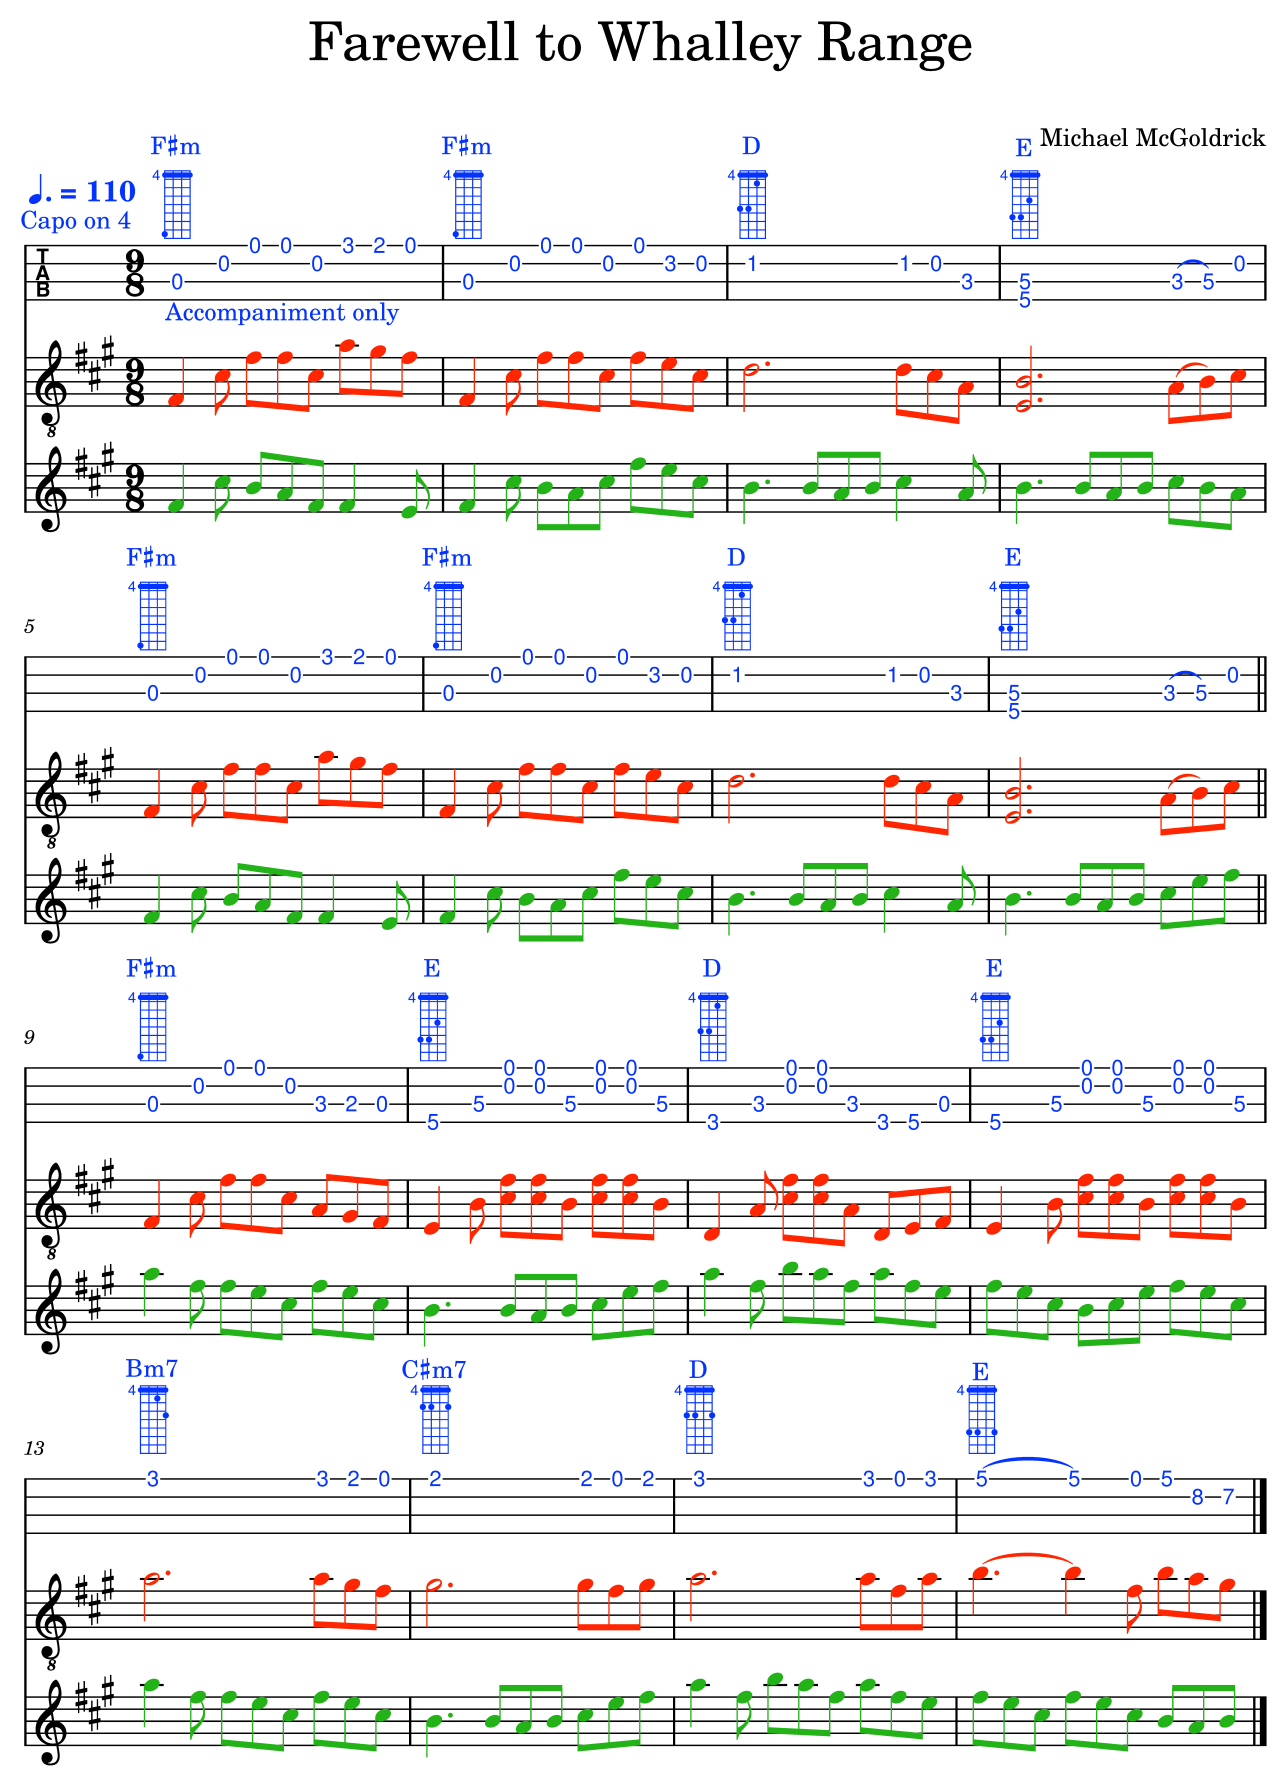
This lesson shows how to build a traditional Irish slip jig from the ground up, using tin whistle melody, Irish bouzouki accompaniment, chord choices, capo position, rhythm, counter-melody, tab writing and practice loops. The tune explored is Michael McGoldrick’s Farewell to Whalley Range, a beautiful F# minor slip jig.
In this lesson, the focus is not simply on learning the notes of a tune. The real aim is to understand the complete process behind turning a melody into a practical, musical arrangement. That includes identifying the mode, understanding the structure, recording a clear whistle reference, building a bouzouki part, choosing playable chords, and creating a version that students can practise from notation and tab.
Instead of the more familiar jig feel of six quavers, the slip jig gives us nine quavers in the bar. That extra group of three gives the music a lift, a lilt and a slightly floating quality that needs to be reflected in the accompaniment.
It is also especially interesting because of the key area. The tune sits around F# minor, which is less common for many traditional players, especially when approached on a D whistle. However, the melody avoids some of the notes that would normally cause problems, making it surprisingly playable and very effective as a teaching tune - there are no G# in the tune and, in fact, there are no Ds at all, which is quite unusual when played on a D whistle. This is because the tune is actually pentatonic (a 5-note scale): F# - A - B - C# - E are the only notes used in the entire tune, so it's extremely easy to play.
- The tune is a slip jig in 9/8, giving it a flowing three-beat feel.
- The melody sits around F# minor and avoids both G# and D, making it unusual on a D whistle.
- The bouzouki accompaniment uses capo 4, drones, simple chord shapes and carefully placed counter-melodies.
Understanding The Slip Jig Feel
A slip jig is felt differently from the reels and jigs that many students learn first. In a standard jig, we normally feel two main beats in the bar, with each beat divided into three quavers. In a slip jig, the bar has three main beats, each also divided into three quavers.
That means the pulse can be counted as 1-2-3, 4-5-6, 7-8-9. The final group of three gives the phrase a little extra lift, and this is one of the reasons slip jigs can feel graceful, spacious and slightly unpredictable if you are more used to reels and double jigs.
Practice Box: Count The Slip Jig Before Playing
Before adding ornaments, chords or counter-melodies, count the rhythm out loud as 1 2 3, 4 5 6, 7 8 9. Then tap the three main pulses while keeping the nine-quaver flow in your head.
Why 9/8 Changes The Accompaniment
The accompaniment cannot simply copy a standard jig pattern. A normal jig strumming pattern such as down-up-down, down-up-down can work in some contexts, but a slip jig often needs a more elastic feel. The rhythm needs to support the melody without making the tune feel too square or heavy.
One useful bouzouki approach is to start with a pattern that emphasises the opening of each group while still allowing the hand to move naturally. A pattern such as down (counts 1&2), then up (count 3), followed by alternating down-up-down (4-5-6), up-down-up (7-8-9). This can help create that forward motion.
Pro Tip Box: Let The Rhythm Lilt
Do not force a slip jig into the same strumming shape as a reel or double jig. The best accompaniment supports the three-beat flow while allowing the tune to breathe.
The Mode, Key And Note Choice
The tune is centred around F# minor, which is already an interesting choice for traditional Irish music. Many players are more used to A minor, E minor or B minor shapes, especially when thinking from a guitar or bouzouki perspective. In traditional music, however, it is often more useful to think in terms of mode, note collection and tonal centre.
In Irish traditional music, the most common modal sounds are Ionian, Dorian, Mixolydian and Aeolian. This tune belongs in the minor-modal world, but the striking detail is not just the tonal centre. It is the notes the tune avoids.
On a D whistle, true F# minor can create difficulties because some notes may not lie naturally under the fingers. However, this particular melody avoids D and also avoids G or G sharp. That means, that on the tin whistle the fourth finger can often stay down, and the tune becomes more manageable than the key signature might first suggest.
Insight Box: Fewer Notes Can Create Stronger Character
This tune uses a limited note collection, giving it a pentatonic quality. Because it avoids certain notes, the melody gains a distinctive colour while also becoming more practical on the D whistle.
Why The Missing Notes Matter
When learning a tune, it is useful to notice not only the notes that appear, but also the notes that do not appear. In this case, the absence of D and G shapes both the whistle fingering and the overall sound of the tune.
For whistle players, this can simplify the fingering pattern. For accompanists, it also affects the chord language. The tune does not demand a strongly functional minor-key progression in the classical sense. Instead, it sits beautifully over drones, modal chord colours and open strings.
Recording A Clear Tin Whistle Reference
A useful first step is to record the melody on tin whistle (or find a slow version of the tune, or slow down a fast version of the tune using applications like Pitch Switch). Even a rough recording can become a very helpful practice reference. It allows the accompanist to loop the tune, slow it down, test chord ideas, and hear whether the bouzouki part is supporting or fighting the melody.
The whistle recording does not need to be a perfect final performance at this stage. Its main job is to provide a steady melodic reference. A click, metronome or notation playback can help keep the tune in time while recording.
In this lesson, the whistle recording was also edited slightly: the beginning was trimmed, a small fade-in and fade-out were added, and a looped version was created for repeated practice. This is an important part of the learning process because it turns the melody into a practical tool.
Common Mistake Box: Practising Only With Full-Speed Audio
If you only practise with the tune at full speed, you may repeat the same mistakes without noticing them. Create a slower loop so that your rhythm, fingering and chord changes can settle properly and you can spot errors more easily.
Using Loops For Better Practice
A looped version of the tune allows you to practise without constantly stopping and restarting. This is especially useful when building an accompaniment part because the first few attempts are often exploratory. You may need to try several rhythmic patterns, chord shapes and melodic fragments before finding something that feels natural.
A slower loop is even more valuable. In the lesson, the tune was slowed to around 86% of its recorded speed, not drastically reduced, but enough to make difficult changes more manageable. This is often the ideal practice range: slow enough to control, but still close enough to the real character of the tune.
Understanding The Structure Of The Tune
The structure of this particular slip jig is also a little unusual. Many Irish tunes use an eight-bar A section and an eight-bar B section, with each section repeated. In practice, that gives the player sixteen bars of A material and sixteen bars of B material.
Here, the tune feels more compact. The A section is built from a four-bar phrase that is repeated, with a small change at the ending. The B section then follows in a similarly concise way. Recognising this structure makes the tune much easier to learn, memorise and accompany.
| Section | Main Idea | Practice Focus |
|---|---|---|
| A Section | A four-bar phrase repeated with a slightly different ending. | Secure the basic slip jig rhythm and F sharp minor home sound. |
| B Section | A contrasting phrase that moves through Bm7 and C#m7 colours. | Practise the harder chord changes slowly before adding speed. |
| Full Tune | A compact slip jig arrangement with melody, chordal support and counter-melody. | Loop the whole tune and keep the accompaniment light and flowing. |
Setting Up The Irish Bouzouki With Capo Four
For the bouzouki arrangement, the instrument is tuned G D A D, using the standard pitch layout G2, D3, A3 and D4. With the capo placed on the fourth fret, the open-string sound is shifted up 4 semitones, creating a new practical playing position for the tune.
With capo four, the effective open strings become B, F#, C# and F#. This is very useful for a tune centred around F# because the instrument naturally gives strong drone possibilities. Instead of fighting the key, the capo allows the bouzouki to resonate in a way that supports the tune.
This is one of the reasons capo use is so important in Irish bouzouki accompaniment. The capo is not simply about making chords easier. It changes the resonance of the instrument, the availability of open strings, and the way the accompaniment sits underneath the melody.
Pro Tip Box: Think In Sound, Not Just Shapes
When choosing a capo position, do not only ask whether the chord shapes are possible. Ask whether the open strings support the tune, whether the drones help the mode, and whether the instrument still rings clearly.
Choosing Chords That Work On The Bouzouki
The chord progression begins around F#5, then moves through D, E, Bm7 and C#m7 colours. Some of the written chords, such as D6, sound beautiful in a fuller accompaniment context, but they are not always practical or convincing on bouzouki.
This is an important arranging decision. A chord may be theoretically correct, but if it does not sound good on the instrument, it may not be the best choice. The bouzouki has a smaller body and a different resonance from a guitar or piano, so heavy four-note chord, that effectively dampens all the strings, make produce the correct chord tones, but can result in a completely dead, muffled sound with no resonance or brightness (i.e. it would sound 'traditional').
In this arrangement, simpler shapes often work better. For example, a plain D shape with an F# drone may sound more natural than trying to force a complete D6 voicing. Similarly, an E sound can be suggested through a lighter shape rather than a full guitar-like chord.
Common Mistake Box: Forcing Full Chords Onto The Bouzouki
A 'complete' chord is not always the most musical option. On bouzouki, too many stopped notes can kill the resonance. Open strings, drones and partial chord shapes often sound more traditional and more alive.
Chord Progression Overview
| Chord Area | Function In The Arrangement | Bouzouki Approach |
|---|---|---|
| F#m / F#5 | Home sound and tonal centre. | Use capo 4 drones and a light slip jig rhythm. |
| D / D6 | Warm colour chord beneath the melody. | Use a simpler D shape if D6 is awkward or dull sounding. |
| E | Modal lift and contrast. | Allow open strings to ring rather than forcing a closed chord. |
| Bm7 / C#m7 | Colourful movement in the B section. | Practise slowly because the shapes and transitions are more demanding. |
Creating A Counter-Melody
Once the basic chords are clear, the accompaniment can become more melodic. A strong Irish bouzouki part often does more than strum chords. It can create small answering phrases, stepwise lines and rhythmic hooks that follow the contour of the tune without getting in the way.
The counter-melody in this lesson is built from the chord pattern already established. This is essential. A counter-melody should not sound like a completely separate tune competing polyphonically against the main melody. Instead, it should grow naturally out of the harmony, the open strings and the rhythmic feel of the accompaniment.
One of the important details is the use of hammer-ons. A hammer-on on the third course helps create motion without needing every note to be picked separately. This gives the accompaniment a more fluid and idiomatic quality.
Insight Box: Good Accompaniment Is Composed, Not Guessed
A short social media performance may look effortless, but the musical decisions behind it often involve looping, testing, correcting, slowing down, changing fingerings and refining the arrangement until it feels natural.
Balancing Melody And Accompaniment
The goal is not to show every possible chord or fill every gap. The goal is to support the slip jig. If the counter-melody becomes too busy, it can distract from the whistle melody. If it is too plain, it may not bring out the character of the tune. The balance sits somewhere between rhythmic support and melodic conversation.
A helpful rule is to keep the first version simple. Start with the basic slip jig rhythm and home chord. Then add one small idea, test it with the loop, and only keep it if it improves the arrangement. This prevents the accompaniment from becoming overloaded.
Writing The Arrangement In Tab And Notation
After working out the accompaniment by ear and by hand, the next stage is to write it down. This is where notation software becomes useful. The tab needs to reflect the capo position, the correct string tuning, the chord shapes and the practical fingering choices.
For this arrangement, the capo is treated as the new starting point. That means the open strings in the tab represent the strings as they sound and function with the capo on the fourth fret. This helps students read the part practically rather than having to constantly translate every note mentally.
Hammer-ons can be shown with a slur and an “H” marking. This makes the tab clearer for students who are trying to understand not only which fret to play, but how the note should be articulated.
Practice Box: Read The Tab Slowly Before Playing
Before playing at speed, look through the tab and identify the open strings, hammer-ons, chord changes and awkward stretches. Silent reading is part of good practice because it reduces surprises when you start playing.
Solving Difficult Fingerings
Some chord shapes work well in theory but become uncomfortable at speed. The Bm7 and C#m7 colours in the B section are good examples. They add a beautiful sound, but they require careful fingering and slow repetition before they feel secure.
When a change is too awkward, it is better to find a musical substitute than to force a shape that causes tension. In this lesson, some voicings were simplified because the full version either did not add enough to justify the difficulty or created an uncomfortable stretch.
Open strings can also be used strategically to give the hand time to move. This is a very practical arranging technique. An open string is not just a convenient note; it can act as a small breathing space that allows the next shape to arrive cleanly.
Common Mistake Box: Ignoring Physical Comfort
If a shape makes your hand tense, slows the tune down or causes repeated mistakes, reconsider it. A simpler, cleaner voicing is often more musical than a difficult chord that cannot be played reliably.
Practice Guidance For Students
Students should approach this tune in layers. Do not try to learn the melody, rhythm, chords, capo position, counter-melody and tab all at once. Each layer should become comfortable before the next one is added.
Start with the slip jig pulse. Then learn the whistle melody or listen to the whistle reference until the phrasing makes sense. After that, add the basic bouzouki rhythm using only the main chord shapes. Once the rhythm feels stable, begin adding hammer-ons and counter-melody fragments.
The most important practice tool is the slow loop. A loop removes the pressure of restarting constantly and allows your hands to learn the shape of the tune through repetition. The slower tempo should still feel musical, not mechanical.
Pro Tip Box: Practise The Ending Separately
If the final chord change or counter-melody figure keeps falling apart, isolate only that bar or two. Loop the difficult ending slowly before returning to the full tune.
Step-By-Step Practice Routine
Use this practice routine to build the tune gradually and avoid rushing into full-speed playing too early.
- Count the slip jig pulse as 1 2 3, 4 5 6, 7 8 9 until the three-beat flow feels natural.
- Listen to the whistle melody several times without playing. Notice the F# minor centre and the absence of D and G#.
- Play the melody slowly on tin whistle, keeping the fourth finger down where possible and avoiding unnecessary movement.
- Set the bouzouki capo at the fourth fret and check the open-string resonance before adding chords.
- Practise the basic F# minor, D, E, Bm7 and C#m7 areas without the full counter-melody.
- Add the slip jig strumming pattern, keeping the hand relaxed and the rhythm light.
- Introduce one hammer-on or counter-melody idea at a time, checking that it supports the tune rather than distracting from it.
- Loop the difficult B section slowly, especially the minor 7 chord changes and final movement.
- Gradually increase the tempo only when the rhythm, chord changes and fingering remain clean.
- Record yourself and listen back for timing, tuning, balance and whether the accompaniment still has a natural slip jig lilt.
Final Thoughts On Building A Traditional Arrangement
This lesson gives a detailed look at the work behind a finished traditional music arrangement. A short performance may last only a minute or two, but the preparation often involves learning the tune, checking the mode, recording reference audio, editing loops, testing chords, solving fingerings, writing tab and refining the final musical shape.
That process is valuable because it helps students understand how accompaniment is created. Instead of copying random chord shapes, you learn to listen, analyse, test and choose. The result is a more musical arrangement that respects the tune and makes sense on the instrument.
For Farewell to Whalley Range, the combination of F# minor colour, slip jig rhythm, whistle melody, capo-four bouzouki resonance and carefully chosen drones creates a distinctive sound. The arrangement works best when it remains light, clear and rhythmically alive.
Key Takeaways
✅ A slip jig in 9/8 needs a different rhythmic feel from a reel or standard jig, so the accompaniment must support the three-beat lilt.
✅ Farewell to Whalley Range is unusual because it centres around F# minor while avoiding D and G#, making the note collection distinctive and practical on D whistle.
✅ Capo four on Irish bouzouki creates useful open-string resonance, allowing drones and partial chords to support the modal sound.
✅ The best chord choice is not always the fullest chord; simple, resonant voicings often work better than awkward shapes.
✅ Slow loops, clear tab, hammer-on markings and isolated practice are essential for turning a rough idea into a confident arrangement.
FAQ
What Is A Slip Jig?
A slip jig is an Irish traditional dance tune in 9/8. It is usually felt as three groups of three quavers, giving it a flowing pulse counted as 1 2 3, 4 5 6, 7 8 9.
Why Is This Tune Unusual On D Whistle?
The tune sits around F# minor, which can be awkward on D whistle depending on the notes used. However, this melody avoids D and G#, making it pentatonic and more playable than the key might first suggest.
Why Use Capo Four On Irish Bouzouki?
Capo four shifts the open strings into a more useful range for F# minor. It creates strong drone possibilities and allows the bouzouki to resonate naturally with the tune.
Should I Play Full Chords Or Partial Chords?
On Irish bouzouki, partial chords often sound better than full guitar-style voicings. Open strings and drones can keep the accompaniment resonant, while too many stopped notes may make the instrument sound damp or heavy.
How Should I Practise The Hardest Chord Changes?
Practise the difficult bar or two in a slow loop before returning to the full tune. Use open strings where possible to give your hand time to move, and simplify any shape that causes tension or repeated mistakes.
Categories: : Irish Traditional Music
Did this article answer all your questions?
If you have any questions, or you want to learn more,
Click the Picture Below to Join the Community for FREE!